May 13, 2026
A home represents a significant investment, and maintaining its structural integrity begins at the very top. When a leak or storm damage occurs, understanding the professional process helps homeowners feel prepared and informed. Clear communication regarding the standard procedures professionals follow helps restore a home’s primary defense against the elements effectively. Knowing what occurs during a service appointment allows for a seamless experience from the moment it begins to the final cleanup.
Preparing the Exterior Worksite
The initial phase of a professional visit involves setting up a safe and efficient environment. Technicians will typically arrive in marked vehicles and begin by identifying the best access points to your roofline. They focus on protecting your landscaping, deck furniture, and siding from potential falling debris during the process. This stage is crucial because it sets the foundation for a clean and organized roof repair project from start to finish.
Safety equipment is the next priority for the crew. They install ladders with stabilizers and set up fall protection systems to comply with local safety regulations. You might notice them walking the perimeter of your house to check for overhead power lines or other obstructions. This careful preparation minimizes risks to the property and the crew while streamlining the actual labor.
Once the perimeter is secured, the team prepares the materials needed for the specific job. They organize shingles, flashing, and underlayment near the access point to reduce foot traffic across your lawn. This organized approach is a hallmark of a professional roof repair service, making certain that all necessary tools are within reach before the technical work begins on the upper levels.
Conducting the Detailed Inspection
Before any shingles are pulled, the lead technician performs a comprehensive evaluation of the damaged area. They look for subtle signs of wear that might not be visible from the ground, such as granular loss or hairline cracks in the masonry. This step allows the team to confirm that the initial estimate aligns with the physical reality of the rooftop. According to This Old House, more than 100,000 roofing contractor businesses were established as of 2025, and the industry reached a revenue of $76.4 billion.
The inspection also covers secondary components like gutters, downspouts, and ventilation fans. A localized issue often stems from a failure in these peripheral systems, so the crew checks for clogs or disconnected joints. By examining the entire drainage path, the specialists can address the root cause of moisture intrusion. This thoroughness prevents future complications that might arise from overlooking small, hidden defects during the roof repair visit.
Attic access may be requested during this phase to view the underside of the decking. Looking for water stains or daylight peeking through the rafters helps the crew pinpoint the exact entry point of a leak. This interior perspective provides a complete picture of the deck's health. Once the inspection concludes, the team explains the findings and the specific steps they will take to address the identified issues.
Executing the Necessary Repairs
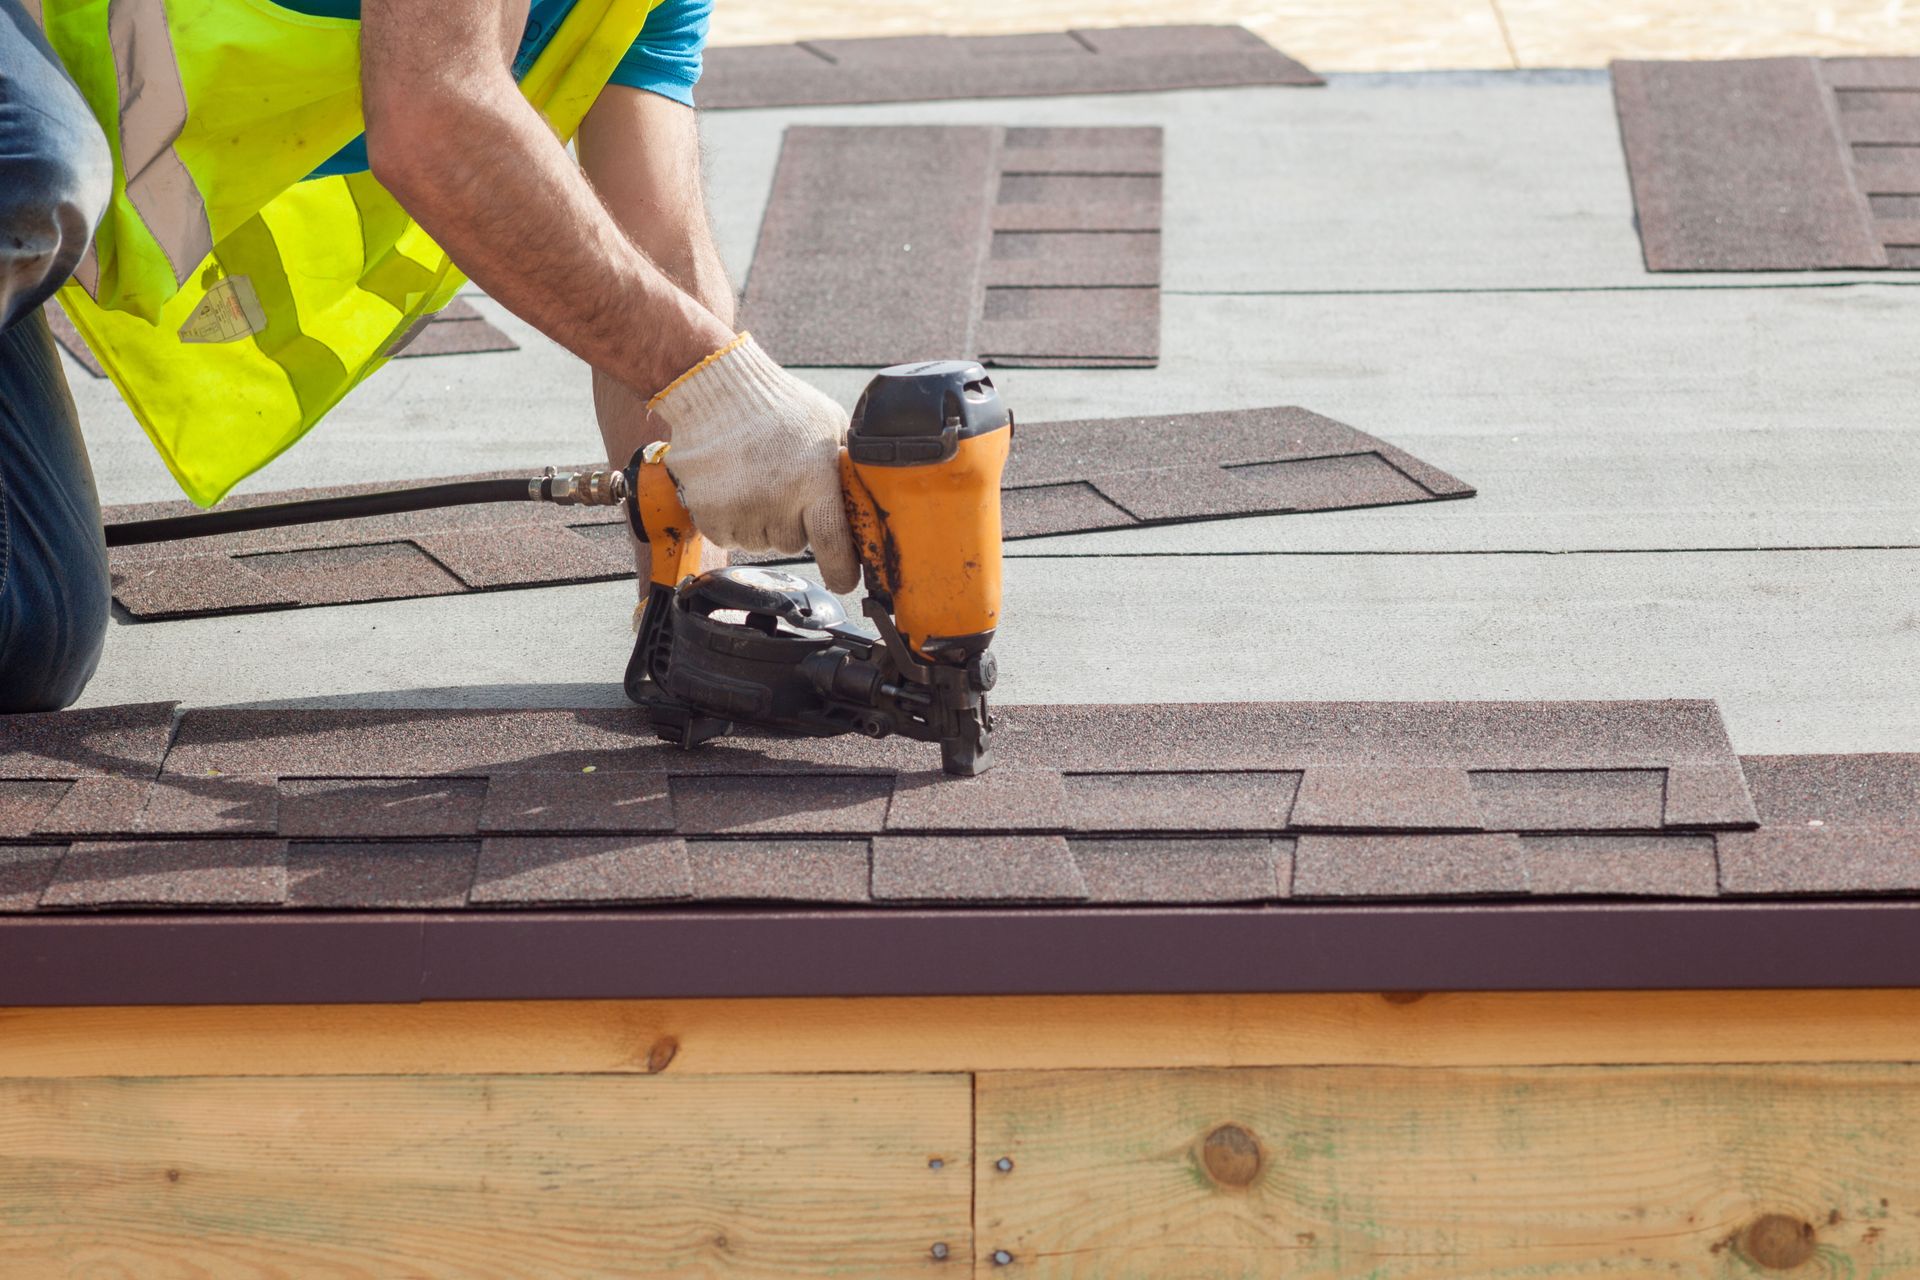
The technical work begins with the removal of damaged materials to expose the underlying structure. Professionals carefully lift old shingles and pry up rusted nails to avoid damaging the surrounding healthy sections. If the plywood decking shows signs of rot or softening, those sections are cut out and replaced with fresh, sturdy wood. This deep level of care is what defines a high-quality roof repair rather than a simple cosmetic patch.
New underlayment and ice and water shields are applied to provide a secondary moisture barrier. The technicians then install the primary roofing material, such as asphalt shingles or metal panels, using industry-standard fastening patterns. They pay close attention to the alignment and overlapping of each piece to maintain the shedding capabilities of the slope. Proper nail placement is vital here to prevent shingles from lifting during high wind events.
Flashing around chimneys, vents, and valleys receives special attention during the installation phase. These are the most vulnerable points on any structure and require precise cutting and sealing. The crew uses professional-grade sealants and heavy-duty metal flashing to create a watertight bond at every transition point. This meticulous execution is the core of a successful roof repair, providing the home with renewed resilience against seasonal weather patterns.
Performing the Quality Check
After the mechanical work is finished, a supervisor or lead technician conducts a final walkthrough of the roof surface. They check for any loose shingles, exposed nail heads, or gaps in the sealant that could lead to future problems. This step provides a layer of accountability and helps keep the workmanship at a high standard. Every valley and ridge is inspected to confirm that the materials sit flush and the aesthetic matches the existing roof.
The team also verifies that all ventilation components are functioning as intended. They check that ridge vents are clear of debris and that soffit vents remain unobstructed by insulation or new materials. Proper airflow is essential for temperature regulation and preventing moisture buildup in the attic space. This systemic check goes beyond the surface to support the longevity of the entire roofing assembly.
Water testing is sometimes performed on specific areas, like complex flashing or skylights, to confirm a tight seal. By simulating rainfall with a controlled hose, the technicians can see exactly how the water flows over the new sections. This proactive measure provides immediate feedback on the effectiveness of the roof repair and allows for instant adjustments if any drips are detected. It is a final step that provides clarity before the crew departs.
Cleaning the Property Grounds
The final stage of the service visit focuses on returning your property to its original state. The crew gathers all discarded materials, including old shingles, packaging, and metal scraps, and loads them into a disposal vehicle. They use heavy-duty brooms to sweep porches and walkways of any dust or granules that may have settled during the day. A clean workspace is a sign of a professional operation that respects the homeowner's environment.
Magnet sweeps are an essential part of this cleanup process. A technician will roll a powerful magnetic tool over the grass and driveway to collect any dropped nails or metal fasteners. This is a critical safety step for families with pets or children who spend time outdoors. The goal is to leave the yard exactly as it was found, with the only evidence of the visit being the newly mended roof overhead.
Before leaving, the lead technician will provide a summary of the completed tasks and any recommendations for future maintenance. They might point out specific areas to watch during the next heavy storm or explain how the new materials will weather over time. This final communication concludes the roof repair service, leaving the homeowner with a clear understanding of the work performed. The crew then performs a final sweep of the street to remove any stray debris before heading out.
A professional service visit is a structured process designed to protect your home and provide lasting results. From the initial site setup to the final magnetic sweep, each step plays a vital role in maintaining the health of your roof. By understanding these phases, you can get through the repair process with confidence and ease. Contact Blue Raider Roofing today to schedule a free estimate and receive professional care for your next project.